Content found in this wiki may not reflect official Church information. See Terms of Use for more information.
How To Use The TechWiki
> Meetinghouse Technology > Videos for Tech Specialists
Editing Documents in The TechWiki
The following article describes how to create, delete, rename, style, link, and make citations and references for articles in the TechWiki. The article also provides other tips and tricks to enable Product Managers to manage content on the Tech Wiki. Please note that as Product Manager you will need to read through all articles submitted by Tech Specialists and provide corrective feedback/deletions for articles that are not accurate or current.
Logging in and Getting Started
Make sure to log into the TechWiki to edit articles, delete articles, discuss with other users, and move articles. The log-in is found on the top left of the article. You can log in with your church account.
Now that you are logged in, let’s discuss each tab found at the top of each article.
Page Tab
The “page” tab shows the article as a normal viewer would see it.
Discussion Tab
The “discussion” tab allows you to communicate with the author of the article. To send a message to the author, select “edit source”.
Note: to get out of discussion mode, click the “page” tab.
Edit Tab
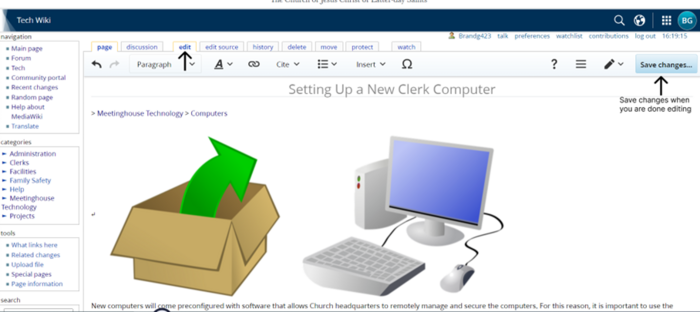
The “edit” tab puts the article in edit mode. You can edit or add additional paragraphs, add images, change the font, create lists, etc. Once you are done making changes, click the “Save changes…” button.
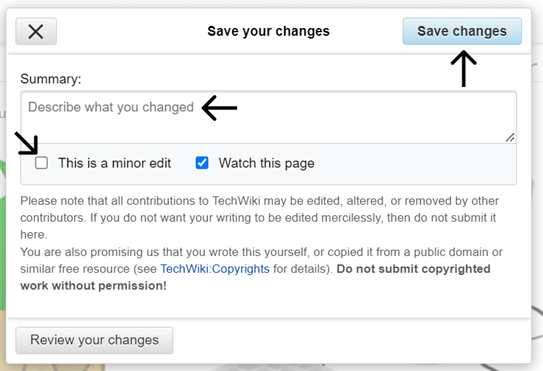
When you click the “Save changes…” button, you need to write a description of what you changed or added to the article. If what you added or changed was a minor edit, select the “This is a minor edit” check box. Click on the “Save changes” button once you are done.
Edit Source Tab
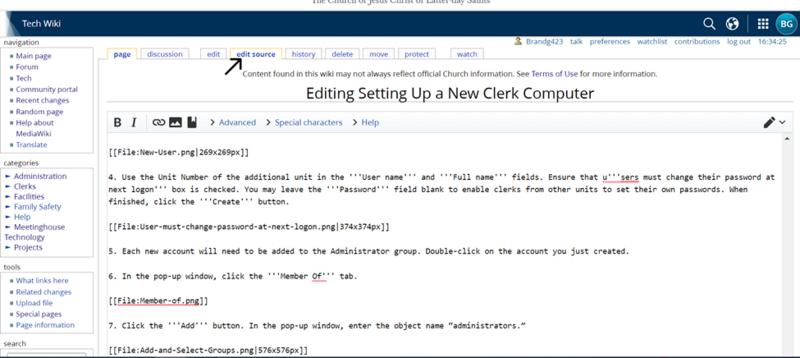
The “edit source” tab allows you to edit the source code of the article. You can do everything that can be done in the “edit” tab and more. You can add tables, customize headers, and change the CSS of the article. I won’t cover how to do those things in this how-to article.
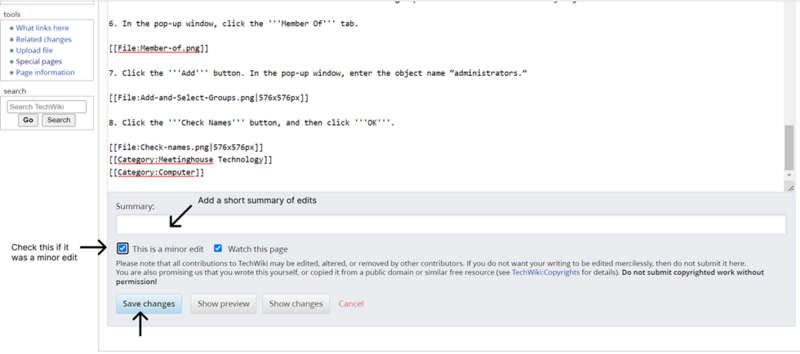
When editing in the edit source editor, you will still need to save and add a description to what you edited. You can find this at the bottom of the page.
History Tab
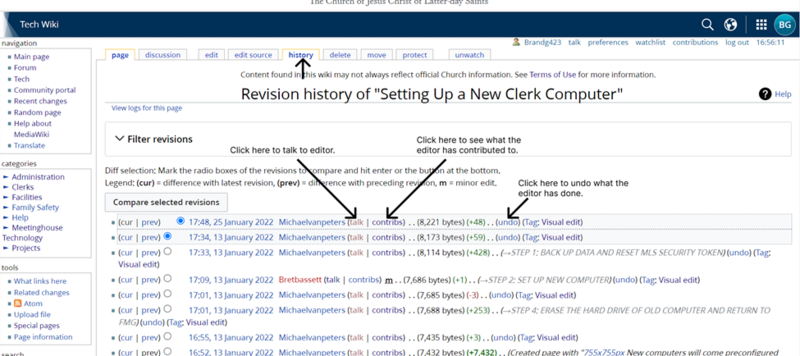
The “history” tab shows all the edits done to the article you are viewing. You can talk to the editor, undo their edits, and see what else the editor has contributed.
Delete Tab
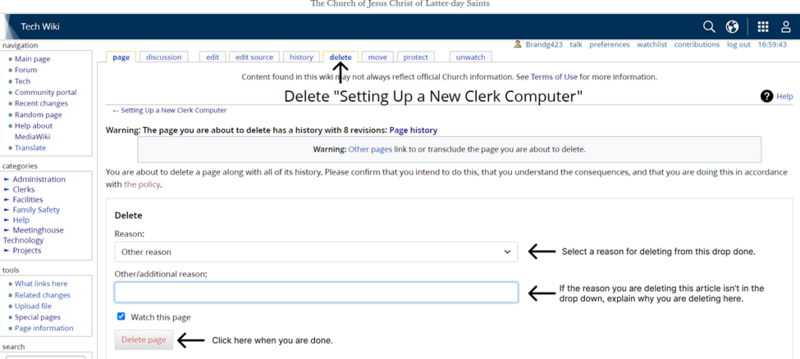
The “delete” tab allows you to delete an article.
Make sure to give a reason why you are deleting this article. Click “Delete page” when you are done.
Move Tab
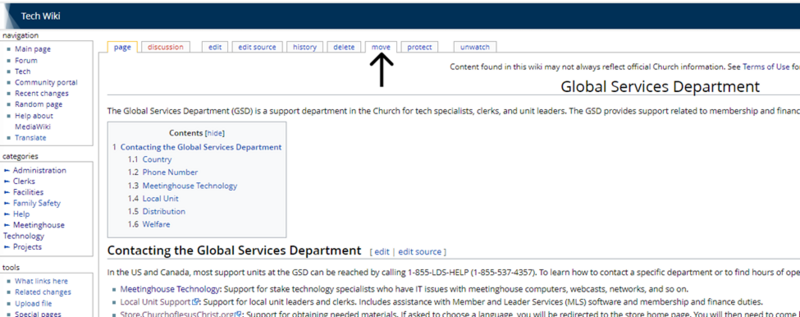
The “move” tab allows you to rename a page, moving all its history to the new name. The old title will become a redirect page to the new title.
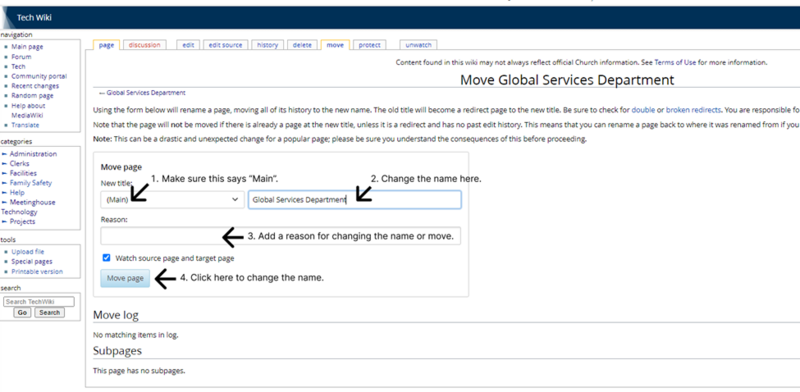
To move a page (rename a page), make sure the new title has the “Main” drop-down selected. Enter the new name. Add a reason for changing the name. Click “Move page” to change the name.
Creating a New Wiki Article
1. Make sure to Log into the TechWiki before creating a new Wiki article.
2. Go to a page in the TechWiki. In the URL, erase the name of the article. Add the new name of the article you want to create. Once you have changed the URL, press enter.
Original URL:
URL with new article name:
3. Click the “create” tab and start adding content! Once you are done, click the “Save page…” button on the top right of the screen.
Styling Text
Make sure you are in edit mode. To do this, click the “edit” tab at the top of the article.
In the ![]() Icon at the top, there are many options to style text.
Icon at the top, there are many options to style text.
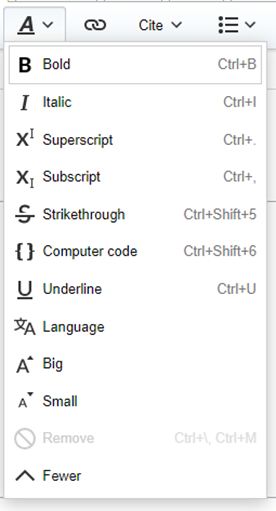
Here are the options of how you can style your text once the text or paragraph is highlighted.
Linking Words to Other Articles
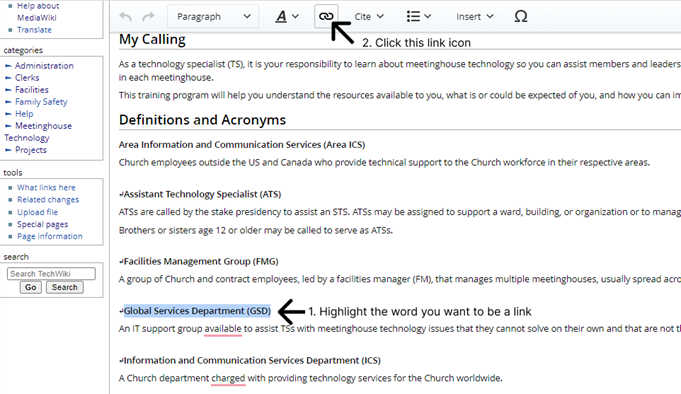
1. Make sure you are in edit mode by clicking on the “edit” tab at the top of the article.
2. Highlight the word or phrase you want to link. Then, click the link icon.
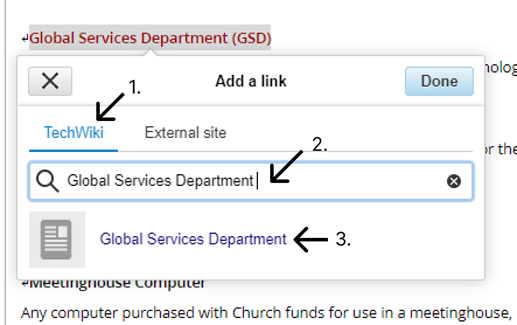
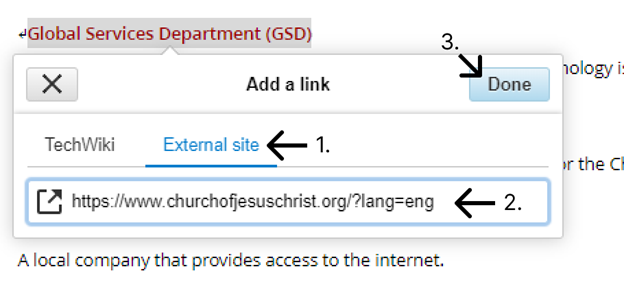
3. Choose a TechWiki article to link to or use a URL to link to an external site.
1. Make sure the “TechWiki” tab is selected.
2. If it is a TechWiki article, make sure you spell the article name correctly.
3. If you spelled the article name correctly, the article name will show up in blue. Click the blue article name to link the articles.
1. Make sure the “External Site” tab is selected.
2. Copy the URL from the website to which you would like to link this text.
3. Click the “Done” button.
Citing Sources and Adding Reference
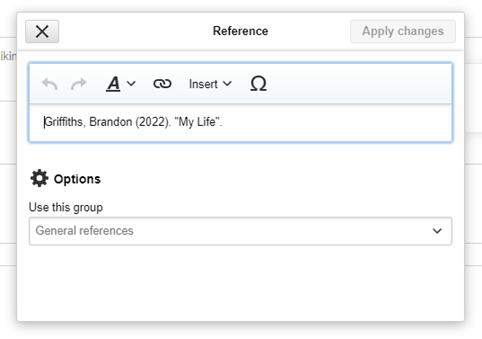
Click on the content in a section then select “Cite”.
Add the reference
This is what it looks like when it is done.


